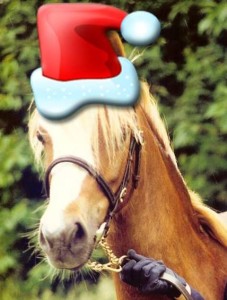
Seven Ideas of What to Buy Your Horse For Christmas
Christmas is right around the corner, and if you are anything like me, you will have been procrastinating since the beginning of fall about when you were actually going to start your Christmas shopping.
Time is running out, and I know one of the most important 'people' on your list is your horse. Yes, we buy stuff for him all year round, but we HAVE to splash out on 'special stuff' at Christmas time. To help you decide and also save you some money, here are seven simple ideas of what to buy your horse for Christmas. Some of them could also be used as gifts for your other horse-crazy friends.
New brushes to replace the worn-out ones in his grooming box. Don't forget to make sure they are color-coordinated with all his other important accessories.
A heated bucket to stop his water from freezing. It makes your life easier, and a horse who drinks warm water during cold weather is less likely to colic.
A Jolly Ball for him to play with while he's stuck in his stall during inclement weather.
Horses, just like people, can benefit enormously from a Magna Wave PEMF treatment. It works on a cellular level to help the body heal itself and relieve pain quickly and naturally.
You could bake him some homemade treats to show him how much you really care. Not only does it save money, but you can be sure you know exactly what he is eating.
You know how photogenic your horse is and how much you like to show him off to your friends. Why not book a photo session for when the weather picks up?
Another good idea would be to buy yourself some lessons. A balanced rider makes for a happy horse.
I hope some of these ideas have helped you. If you have any ideas to share, let us know on our Facebook page.
Before I explain how we found Opie, I would like to take this opportunity to thank everyone who took time out of their busy lives to help look for him. Some people have been to Carolina Horse Park every single day since he went missing. They set traps, walked the grounds and lanes, posted flyers, and talked to neighbors. The showground sent a mass email and had all their employees looking for him. Facebook warriors followed his "Find Opie" page and shared it with their friends. It really took a village, and I am incredibly grateful to all of you.
Who is Opie?
Opie is a character! We call him the CEO of White Rose Equestrian because he has to be in everyone's business. Whenever we do jobs around the property, he casually saunters up to ensure we do it correctly. He likes to follow us when we trail ride and thinks nothing of "helping" at horse shows. Opie exudes personality and presence and has never met a stranger. He greets visitors to our farm and loves everyone. Well, apart from our neighbor's large German Shepherd; he sends him packing back home again with a swift ninja maneuver of hisses, claws, and flying fur.
Opie is also known to be a stowaway, and that's how he ended up at a horse show with us. If you visit us and leave the windows of your car open, you need to inspect it thoroughly before leaving, or he might go home with you. From now on, we will carefully check our vehicles and horse trailers before leaving the property.
Opie's adventure
I'm sure Opie was only too proud of himself for sneaking into the living area of our trailer and snuggling himself into the bed. We were not quite so pleased when we discovered him there. It was late on Thursday, November 10th, 2022. We pulled into Carolina Horse Park amidst a torrential rain and thunderstorm. When we discovered our stowaway, we made sure he was safe while we unloaded the horses. Cold and wet, and almost midnight, we set up camp. The kids with us thought it was fun and amusing that we had a cat with us. I wasn't too concerned, as I felt he would be safe in my trailer until we went home. He quickly made himself at home and slept soundly the first night we were there.
The next morning I put him in the horse area with food and water and periodically checked on him. I'm sure he slept most of the time, dreaming of returning home.
The show must go on
The weekend passed as most shows do. We were busy with barn chores, horses, competition, shopping, socializing, and cat sitting. I was thrilled with my rider and my own horse. We both made great improvements, and I went to bed Saturday evening around 10:00 pm. I brought Opie into the living section of my trailer, but he was loud and restless. I'm sure that after two days of captivity, he was ready to roam. Of course, I couldn't let him out, so I put him back into the horse section in case he needed to go potty. Our barn manager and his family were in the trailer next to mine. Our barn manager went to bed around 11:00 pm and could hear Opie complaining in my trailer.
The night passed as usual until I went into the horse section the next morning to check on Opie. He was nowhere to be seen, and the middle window was open. At first, I wasn't too concerned. Opie is bold and friendly, and I figured he would be close by. As everyone else went to the barn to take care of the horses, I, along with our not-a-blood-hound dog, Piper, set off to look for the wayward wanderer.
I checked the pavilion, house, under trailers, sheds, and around the barns. As time went on, I became more and more concerned. I was sure that if he could hear me, he would come out of hiding or, at the very least, cry for attention. As I walked around the property calling his name, people assumed I was looking for a dog. I explained the situation, and the office was kind enough to make announcements over the tannoy system.
The dread set in
With every step and every call, my heart sank deeper and deeper into my chest. Stark, jagged memories came flooding back of walking through scrub and brushland around Charlotte as my husband and I searched endlessly for my son, Sam. I crammed the negativity deep into my soul and continued the search until my voice was hoarse and my energy depleted. We were done with our rides early in the day, but I couldn't bring myself to leave without him. Finally, pulling away from the showground was excruciating. I felt as if I was leaving my baby behind. Our journey home was silent and somber.
Using the knowledge I had gleaned when looking for my son and running the Find Sam Davis page, I quickly set up a Find Opie Facebook page. A lady, Andrea, who had reached out to me before we left, agreed to search for him until he was found, and she did just that, and people at the showground were also looking for him.
The story gets weird
His story took hold, and leads and tips came trickling in. The saddest part of this endeavor came when a lady about fifteen miles away from the horse park contacted me to say a cat had been hit by a car near her house. She sent pictures to us. I chose not to look at them. Due to the injuries, my husband couldn't be sure if it was him. The lady kindly took the cat to a vet to have it scanned. Either the chip didn't work, or it didn't have one. I hoped against hope it wasn't him.
Now here is where the story gets weird, so stick with me. She agreed to store him in her freezer until we could view him in person. On our next visit to the park to search for Opie, we visited with her and agreed to bring home Freezer Kitty and give him a proper burial. So now, for the time being, I have a cat in my freezer. There are not many people who can say that!
A sighting
Just before Thanksgiving, someone called me who lives about a mile from the showground. He was sure he had seen Opie. He and Andrea set traps in the area, and my husband and I drove up there to look for him. We baited the traps and set them with some of our unwashed clothes. Eventually, a cat matching Opie's description was captured in that area but proved not to be him. It was a stray who was whisked off to be fixed before being released back from whence he came.
The last search
Yesterday, Tuesday, November 29th, I once again put my life on hold and drove three hours from my home to roam and call for our missing fluff ball. My dog, Piper, accompanied me. She might be a dog, but she is no bloodhound. My granddaughter, Lena, likes to play hide-and-seek with her. She tells her to sit and stay, then hides somewhere in the house. She hollas, "Piper." Piper darts off careening around our home, looking for the missing child. One of Lena's favorite hiding places is behind the curtains in the dining room. Piper can run past her multiple times, completely oblivious to her presence, even though her chubby little feet are sticking out from underneath the draperies. So, Piper was there merely in the capacity of companion, not searcher.
When I was younger and arduously looking for something, my mum would always say, "it will be in the last place you look." Just to prove her wrong, I have been known to continue looking for something after I have actually found it. But that is another story altogether.
When I arrived at the showground, I presented my Facebook live video in the hopes that someone might know something that would lead us to Opie. I then tentatively set off to check the traps and trudge once more around the abandoned park. At one point, over behind where they dump the mountains of manure, I thought I heard the faint whisper of a cat. Coincidentally, it was the same location where we thought we'd heard a feline the first day we searched.
Setting traps
When Andrea arrived, we set a trap there and baited it with pungent and enticing salmon. The critters of Carolina Horse Park have never eaten so well. Andrea knows the area far better than I and stated that of all the directions Opie could go, she hoped it was not this one. All that stretched out from that point onward were creature-infested woods. We baited more traps, and I was joined by another lovely, caring lady, and we walked the entire cross-country course. The light began to fade, and I made the heartwrenching decision to head back home.
The news
I passed the time during my drive home by switching radio stations and talking to Piper. I was over halfway home when I received a phone call from a number I didn't recognize. When you have a missing family member, you quickly learn to answer all and every incoming phone call. A sweet voice on the other end said, "I don't want to get your hopes up, but I think I have your cat." Having already received unproductive leads, I wasn't too excited until she said, "I've tried to get some photos of him, but it's difficult as he is such a lovebug and won't leave me alone."
I asked if he had a white face, a white lower jaw, and a small notch missing from his right ear. The delightful word, yes, floated into my ear as I scrambled to find somewhere to pull over so I could look at the pictures she had sent me.
It was him! I knew instantly. I forwarded them to my husband and daughter and turned my car around. Maybe I broke the speed limit as I raced back, but, shhh, don't tell anyone. She greeted me at the door and led me into her mudroom. Opie sloped up like a sleazy lounge lizard as if to say, "What took you so long?" His purr was deafening as he rubbed his pheromones all over me.
His long journey
So, can you guess in which direction he had ventured? Yes, of course, into the creature-infested woods! As the crow flies, he had traveled about three and a half miles. We will never know his exact path or any of the adventures he encountered on the way. Other than having lost some weight, he is no worse for his epic journey.
Once again, I headed for home. This time with a huge smile on my face and a heavy burden lifted from my heart. I pulled into my driveway just before 1:00 am, exhausted but elated. Opie spent the night in the house with us. I will be keeping a close eye on him until I feel he has acclimatized to being home.
I recently saw a post in an equestrian group on Facebook asking, how much does it cost to keep a horse for a year? Many people responded. My favorite answer was 'your heart and soul'. That pretty much sums up the life of an equestrian. But, it got me thinking. Horses and the sports that go along with them are, for most of us, far more than a hobby they are a way of life.
I would hazard to guess that not many equestrians know how much they spend annually on their passion. They will know how much they spend on board, farrier, and the vet but don't always take into account clothes, necessary tack, unnecessary extras such as treats, blingy browbands, the latest style of saddle pad, or any other accompaniments that equestrian brands tell us we must have.
Below I have attempted to put together a list of expenses relating to keeping a horse. It shows three varying options. The lower end includes the basics, the middle range covers possible unforeseen expenses, and the latter has all the bells and whistles. I have then averaged out these prices. Of course, I can not include all scenarios and these prices are subject to fluctuation depending on the type of horse, discipline, and location.
I would love to hear your opinions and have some feedback.
Annual Cost to Keep a Horse*
Service
Pasture Board
Basic Full Board
Full Board in a
Show Barn
Average
Board
$3,000
$6,000
$10,000
$6,333
Lessons
$0 don't take
lessons
$2,600 one lesson
per week
$7,800 one lesson and
one trainer ride per
week
$3,467
Farrier
$390 barefoot
every 6 weeks
$1,040 full-set
every 6 weeks
$2,080 full-set
every 4 weeks
from the best farrier in town
$1,170
Vet
$400 shots and
teeth floating
$2,400 basics
plus unexpected
lameness
$6,600 basics,
lameness, chiro,
Magna Wave
$3,133
Tack
$500 basic needs
$2,000 basic needs
and upgrades
$6,000 basic needs,
upgrades, plus new
top-of-the-range
saddle as the horse's
physique has changed
due to training
$2,833
Clothes
$500 barn boots,
pants, etc.
$2,500 boots, new
riding clothes
$5,000 basics plus
latest fashion trends
$2,667
Showing
$0 do not show
$400 a few local
shows
$8,000 six rated shows
including entries,
accommodation,
trainer, etc.
$2,800
Misc.
Expenses
$500
$1,000
$3,000
$1,500
TOTAL
$5,290
$17,940
$48,480
$23,903
I will admit to being frugal when it comes to spending money so it is possible that these prices are on the low side. No matter what kind of barn you board at, whether or not you show, or how often you buy new clothes, one thing is very clear, the decision to buy a horse should be given a great deal of thought and you must be sure you can afford to cover all your known and unexpected expenses.
How much do you think it costs to keep a horse for a year?
*Prices are per annum based on average prices around the Charlotte, NC area in the summer of 2019 and are subject to change.
Follow our every move and keep up-to-date with tips, advice, and events, etc.
Day after day we see a weather forecast with highs in the 90s. Perfect if you plan to sit around a swimming pool with a cold beverage. Not so perfect if you happen to be a barn manager.
If you board your horse be sure to thank your barn manager and barn hands for all their hard work in all weather conditions.
Below is a lighthearted look at just a few things you will never hear your barn manager say in summer.
Oh goody, another scorching hot day ahead.
I think I'll ride at noon today instead of 7:00 a.m.
I'm so glad it hasn't rained in over a month. The straw-like grass is so beautiful.
I love global warming.
No, I'm not looking forward to fall.
I love mucking stalls when it's really hot. Makes me think I'm in a sauna.
Changing clothes two and three times a day makes me so happy.
I don't think I'll shower tonight.
Think I'll call in sick today.
This fly-spray really works.
Hat hair is the best. Wet, hat hair is even better.
I love my farmer's tan, especially my pasty, white feet.
Here are a few of the must-have products that help me get through the summer.
Yeti Rambler 26oz tumbler keeps drinks cold for hours.
Precaution and common sense should be the key elements whenever you are approaching and handling horses. They are living creatures with a mind and will of their own and should be treated with a firm yet respectful hand. Take care when handling horses in order to keep you, other people, and the horse safe, and to prevent accidents. Consistency also helps the horse to understand his role in the relationship and behave appropriately.
Horses have been domesticated for many years but they still rely on their natural instincts to stay safe. If they feel threatened they will try to run away or, if cornered, can kick or bite to protect themselves. Whenever you are around horses you should be calm, move slowly, and speak softly. Loud or sudden movements or unexpected noise could startle them. Different surroundings or experiences can also cause a horse to become nervous. If this happens pat and stroke him gently and speak calmly and reassuringly to him.
Whenever possible, approach a horse towards his shoulder rather than straight towards his face or from behind. Due to the placement of the horse's eyes on the side of his head, he has a good all-around vision but does have a blind spot directly in front and behind. Let him know that you mean him no harm by walking slowly and talking to him in gentle tones. If he will let you, stroke his neck or shoulder rather than his face or nose.
If he is tied up and must be approached from behind, let him know you are there by talking to him before you approach. Although he can see behind him he does have a blind spot directly behind his rump. NEVER approach a horse directly from behind without first talking to him as he might be snoozing. If you startle him he could kick out in defense. Once he hears you and turns his head and can see you it is usually safe to approach him. Be vigilant and calm at all times.
Some Basic Rule For Correctly Handling Horses
do not run, shout, or make loud noises around horses
remember that some things that we take for granted might seem scary to a horse if he hasn't encountered them before. These can be anything from dogs, chickens, and other unfamiliar animals to balls, children's toys, or items blowing in the wind, etc.
pay attention to where your horse puts his feet. He might accidentally step on your foot and not even realize. You should ALWAYS wear strong, sturdy footwear at the barn and never approach a horse in sandals, flip-flops, or bare feet.
avoid being around the rear of a horse unless you are working on him i.e. grooming, picking out his feet, applying a tail bandage, etc. If you have to be behind a horse use caution and keep one hand on him at all times. If he moves quickly you will not only see this movement but also feel it and be able to act accordingly.
have BOTH feet on the ground at all times (sometime this rule may have to be broken if you are braiding the mane of a tall horse, more about that later). Do not sit or kneel on the ground near a horse as that would make it too difficult to get out of harm's way should the need arise.
do not take food into a field full of horses even if you have a horse who is difficult to catch. If you are surrounded by a group of horses all trying to get to the food you are in a very dangerous position.
when you are handling horses around other people you need to also be aware of their actions and behavior. Politely show them how to behave and act in order to keep everyone safe.
How to Catch a Horse
Some horses are easier to catch than others and some are almost impossible to catch. For the purpose of this explanation, we will assume that the horse is reasonably easy to catch. (We will cover in a later blog series how to retrain a horse that is difficult to catch). One way to avoid ending up with a horse that is difficult to catch is to ensure that you catch your horse for reasons other than work. Catch him, from time to time, just to groom him or give him a treat and he will be far more likely to come to you in the field.
Safely catching a horse and bringing him in from the field.
Enter the field calmly but with purpose. Walk towards your horse's shoulder, rather than his face or hindquarters, and call his name softly. Make sure that he has seen you, then walk up and slip the lead rope around his neck. Pat him gently on the neck or shoulder. With the lead rope still around his neck, carefully put on his halter (see next paragraph). Lead him out of the field making sure to avoid any of the other horses that are in there with him. If there are horses gathered around the gate area use a stern but quiet voice and, if necessary, hand gestures to make them move. Do not lead a horse through a group of other horses as this would put you in a dangerous position. Open the gate wide enough for both of you to get through safely but not wide enough that any other horses could escape. You might want to take someone with you to hold the gate until you feel comfortable doing this alone.
How to Put on A Halter
If a horse is loose in a stall or a field you will need to catch him and put on his halter. To halter a horse stand close to his left shoulder, facing forward. Loosely loop the lead rope around his neck to keep him still. Some halters have a buckle and some have a clasp, therefore, fitting them will be slightly different depending on which kind you are using.
Using a Halter With a Buckle
Standing near the horse's left shoulder and facing forwards, hold the halter buckle in your left hand and the crown-piece (strap) in your right hand. Reach under his neck with your right hand and guide his nose carefully into the noseband. Pass the crown-piece over the top of his poll and attach it to the buckle on his left cheek.
Using a Halter With a Clasp
Standing near the horse's left shoulder and facing forwards, make sure the clasp is open on the halter. Guide his nose into the noseband and gently lift the crown-piece over his ears, one at a time. Reach under his chin for the clasp and attach it to the ring on the left side of his cheek.
How to Lead and Turn a Horse at Walk and Trot Up In Hand
You should always use a halter and lead rope to lead a horse unless he is bridled. Never lead him by holding onto the halter. If something goes wrong and you let go he could run off and endanger himself or others or he could drag you off balance causing you injury.
A horse should be accustomed to being led from either side but the most accepted way to lead a horse is from the left (near side). The lead rope should be attached to the center 'O' ring under the horse's jaw. Hold the lead rope, in your right hand, close to the ring but DO NOT put your hand on the ring or your finger through it. Hold the remaining lead rope folded in your left hand. DO NOT wrap any of the lead rope around any parts of your body.
Ask your horse to walk on by standing near his left shoulder facing the direction you wish to go. Say 'walk on' and start to move. Most horses will oblige and start to walk. If he does not walk do not be tempted to get ahead of him or start pulling on his head. Carry a crop in your left hand and, reaching back behind you, tap him gently on this flanks. If you don't have a crop with you, you can use the loose end of the lead rope. You should continue to look ahead and remain next to his shoulder. Once he starts to walk make sure that your right arm is outstretched so as to keep him at arm's length preventing him from stepping on you by accident.
To turn a horse you are leading, whenever possible, turn him away from you. Steady him by putting a little pressure on the halter by pulling very slightly on the lead rope. Move your right arm further away from you and move him to the right. Stay at his shoulder. By turning him this way he is more likely to stay in balance than if you pulled him towards you. He is also less likely to step on you as he turns.
To make him trot do the same as you did to make him walk. Stay next to his shoulder, say 'trot on' and start to jog. If he does not move into the trot use the crop behind your back with a gentle tap on his flanks. The lead rope should be slack enough to allow him to carry the weight of his head naturally but not so slack that he, or you, might get your legs caught up in it.
Leading and trotting a horse up in hand, along with standing a horse up (see next section) is usually done without a saddle for either a veterinary inspection, for someone considering buying the horse, or for a judge at a show. The horse should be able to move freely and confidently but not hurried or unbalanced. If you need to lead a horse in an unfamiliar setting it would be best to put him in a bridle, instead of a halter, which would give you more control. It is usual to walk a horse away from the person inspecting it and then directly back towards them. They should move out of your way allowing you to pass by them. They will then usually ask you to do the same in trot.
How to Stand a Horse Up Correctly
The term standing a horse up simply means he is standing still, looking attentive, and showing his conformation to the best advantage. He should stand square. This means his front legs and back legs should be next to each other with his weight evenly distributed between all four legs. If he isn't standing squarely move him forwards slightly and stop again until he is. You should stand in front of him facing his head so that you don't obstruct the view of the person looking at him. If he is wearing a halter place one hand on each side of the noseband with the end of the lead rope in your left hand. If he is bridled hold one rein in each hand near to the bit. Raise your elbows slightly so that he doesn't try to nibble your wrists.
How to Hold a Reasonably Quiet Horse for Treatment, Shoeing, or Clipping
No matter how often your horse has been tied and expected to remain in one place there may come a time when you have to hold him for some reason. Whatever the reason, the most important thing is that you and the horse are both secure and safe.
Holding a Horse for Treatment
If your horse needs to be treated by a vet, the best thing to do is to listen carefully and follow their instructions. However, you know your horse and you might want to suggest that they treat him either in the stable or out of the stable depending on whichever he prefers. If you think he might be difficult to control it would be best to put him in a bridle instead of a halter. Do not tie him up. If you are using a halter and lead rope you could thread the lead rope through the Equi-Ping™ or breakable string but do not tie it, not even with a quick release knot. Your horse will probably think he is tied up but it still gives you the freedom to act should a difficult situation arise. Stand on the same side as the vet, unless they tell you otherwise. Do not, however, get in their way. When the vet has finished the treatment listen carefully to their instructions and be sure to follow them exactly. If they are complicated, write them down.
Holding a Horse for Shoeing
The same as above would apply but it will not always be possible to stand on the same side as the farrier as you might get in his way. If necessary, stand facing the horse as you would when standing him up.
Holding a Horse for Clipping
The same as above. Listen to the person doing the clipping and do as they ask.
How to Tie a Horse Up
The best way to secure a horse is either with a halter and lead rope or with a halter and cross ties. NEVER tie a horse up with a bridle. It is an expensive piece of tack to replace if broken. It can also result in a broken jaw of you tie up to the bit and the horse pulls away suddenly.
Tying Up to a Single Securing Ring
The lead rope should be fastened to the 'O' ring at the back of the noseband. Always use a quick release knot and NEVER tie directly onto the securing ring but instead use an Equi-Ping™ or breakable string (bailing twine works well for this). Although the reason for tying up the horse is to secure him in one place, it is very dangerous if he tries to break free and cannot. He could seriously injure himself in any struggle that might ensue. It is better for him to break loose.
Unless the horse is very trustworthy only tie him up in a stable or another enclosed place. Never tie him to an unsafe object such as a loose fence or thin branch on a tree. The securing ring should be placed high enough so that he cannot get his legs caught over the lead rope. Never tie him to a hay net. (Do not tie the hay net to the breakable string, it should be tied directly to the securing ring). If the horse tends to chew the lead rope either soak it in an unpalatable (but not poisonous) substance or use a chain. If you use a chain the breakable string should be between the chain and the halter not on the securing ring. You wouldn't want your horse to break loose and drag a chain along with him.
Cross-Tying
Cross-tying is very popular in America and is a means of tying a horse with two lead ropes or chains rather than just one. The horse is positioned between two walls or strong posts about 6 ½ feet apart, with the ropes or chains fastened to the Ds on each side of the halter. In barns where this kind of tying up is common practice, the cross-ties are permanent fixtures. They should always have some kind of Tie Safe™ or quick release mechanism attached to them. Do not use them if they don't. They are often used in grooming or wash stalls as they do not allow the horse to move as much thereby giving you more control. They should always be used if you are transporting a horse in a double trailer without the center partition.
How to Turn a Horse Out in a Field
When you are ready to turn your horse out into the field lead him there in either a halter or bridle. Usher away any horses that might be standing at the gate. Open the gate wide enough for you both to pass through safely. Make sure you close and latch the gate behind you. Walk him a little way into the field and turn around to face the gate. By doing this he will have to turn around before he can run into the field to join the other horses. If you let him go while he is facing into the field he could run over you by mistake in his haste to join his friends. If there is more than one of you turning horses out, make sure you all let go of them at the same time. If you do not follow this simple rule you could be dragged along if your horse tries to run off before you have let him go.
Whenever you are around or handling horses safety is of the utmost importance. By following the rules above you should be able to enjoy your time at the barn and around horses and ponies.
Disclaimer: We do not warranty any of these companies or products. These are items we use/have used and find them suitable for our needs. You should research these products before purchasing them. We are not sponsored by any of the aforementioned companies or products. These products have been bought by us for our own use. The links are affiliate links.
Follow our every move and keep up-to-date with tips, advice, and events, etc.
It is necessary to regularly groom your horse not only to keep him clean but also to inspect him to ensure that he is healthy and not injured in any way. You should groom, or at least, check your horse every day even if you do not ride. He must be clean before he is ridden or tacked up, to prevent sores caused by the tack rubbing against his dirty or muddy skin. Over the years many new products have been introduced to the market that horse owners feel they just have to buy for their ever-expanding grooming box. However, we have listed below the essential items that every grooming tote should contain.
Basic Items of a Grooming Kit
body brush - a soft bristled brush used for removing dust and scurf from the coat, mane, and tail. It usually has a flat back and broad, material handle. I particularly like the flexible type of body brush as it contours to the horse's body better than a regular kind. Do not use on grass kept horses as it removes too much of the natural oils that keep a horse warm and dry.
curry comb - the metal type of curry comb is used for cleaning the body brush and should never be used on a horse. Plastic curry comb and rubber curry combs are also be used for this purpose but can be used on a grass kept horse to remove dry mud.
cactus cloth or all-purpose grooming mitt - this is a slightly abrasive cloth that is used to remove dry mud or sweat marks
dandy brush - a hard bristled dandy brush is used for removing heavy dirt, dried mud, and sweat marks. It is most useful on a grass kept horse. Do not use on a clipped horse, a horse with sensitive skin, or on any part of their face as it is too harsh. Some of the modern dandy brushes on the market have soft bristles and do not work well for this purpose.
hoof pick - used for picking out the feet. If you get a hoof pick with the bristles opposite the pick it can also be used to clean the outside of the hooves.
hoof oil and brush - hoof oil is used for oiling the hooves to protect them from cracking and splitting (usually in summer) or too much moisture (usually in winter).
mane comb - use a mane comb to pull and braid manes. I like this style of mane comb with a long handle as I find it easier to hold. Do not use combs to de-tangle tails as they break the hairs.
massage pad - used to massage your horse's muscles, especially after exercise, and to promote circulation (see strapping below).
sponges - you will need, at the very least, two sponges. One for cleaning around the face; eyes, nose, and muzzle, and one for cleaning the dock.
sweat scraper - to remove surplus water or sweat. These aren't used in everyday grooming. There are two types to choose from. The half-moon style or, my favorite, the metal sweat scraper.
water brush - a soft bristled brush to dampen down the mane and tail and wash the feet. You could also use a sponge for this job if you prefer.
There are other items you may need in your grooming kit depending on the time of year and discipline that your ride, and area of the country you live, for example - fly repellent, elastic bands or needle and thread for braiding, scissors and clippers for trimming, etc. The list could go on and depends very much on what you feel you need. Horses that live most of their lives in a stable should be groomed thoroughly every day. Horses kept at grass do not need that much attention as too much grooming will remove the grease naturally present in the horse's coat. The grease helps to keep them warm and dry. You should wash your grooming kit once a week in warm soapy water. A mild disinfectant may be added. Once you have washed the dandy brush you should dip the bristles in cold water. This helps to keep them stiff. It is important to keep your grooming supplies clean as you can not clean a horse with dirty brushes. Before you begin to groom your horse he should be tied up correctly as described in the previous blog post Correctly Handling Horses. Do not try to groom a horse who is loose in a field or stable. If they try to get away from you, you will have no control over them. If you do groom them in their stable be sure to remove all food, water, and buckets to prevent them from becoming contaminated with dust and dirt.
How to Groom a Horse
There are four different types of grooming. Whenever grooming a horse make sure that he is comfortable at all times. If the weather is cold and he is wearing a blanket unbuckle it and fold it in half keeping it on his rear end. Brush the forehand on both sides before replacing the blanket, then fold it up over the forehand and brush his hind end. This prevents him from getting cold.
Quartering
This process is a quick brush with a dandy brush and curry comb to remove stable stains and make him presentable and clean enough to ride. Horses that are clipped have sensitive skin. A cactus cloth instead of a dandy brush as it isn't as harsh. Sponge his eyes, nose, and dock, and pick out his feet. Quartering is adequate for a horse that lives outside in a field. Depending on which part of the country you live in or what time of year it is you might also need to check him for ticks and spray him to repel flies in summer.
Full Groom
A full groom is best done after exercise and is described below in the Method of Grooming section. Grooming is more effective when the horse is warm as his pores will be open. Full grooming is not recommended for grass kept horses as it removes too much of the natural grease that keeps the horse warm and dry.
Strapping
This is a massage used to harden and develop muscles on stabled horses in consistent work. It invigorates the blood supply to the skin and makes the coat shine. Originally a wisp made of woven hay or straw would have been used but nowadays most people use a soft massage pad with rollers (see the image of Basic Items for a Grooming Kit). Slap the muscles in a regular rhythm in the direction the coat lays. Only massage the muscles on the neck, shoulder, quarters, and thighs. Do not use on an unfit horse as their muscles aren't strong enough for a vigorous massage.
Bush-Over or Set-Fair
For a stabled horse, at the end of the day, you should lightly brush him over when you straighten or change the blankets. This is the time that you also remove any droppings from his stall and tidy his bedding to make him comfortable for the night.
Method of Full Grooming
picking out the feet - using the hoof pick, pick up his feet one at a time. First, talk to him then face his tail. Start with his front leg and run your hand, closest to his body, down the back of his leg. When you reach the fetlock say 'up' and squeeze the joint. Catch and support his leg under the hoof. If he doesn't lift his leg you may need to lean gently against him with your shoulder to push his weight onto this other leg. Pick the hoof from heel to toe making sure you avoid the frog (the softer triangular, center of the hoof). Make sure you carefully clean the cleft of the frog (the groove down the middle), and the bars down the side.
To pick up the rear foot stand next to his hip facing his tail. Speak to him and run your hand, nearest to him, down the back of his leg to the point of the hock. Then move your hand to the front of the cannon bone. When you reach the fetlock say 'up'. When he lifts his leg place your hand under the hoof from the inside. Do not lift it too high or pull it too far back as this will make him unbalanced. If he doesn't immediately lift his foot you may need to lean slightly against his hip to push his weight onto his other foot. Most well-trained horses will anticipate the next leg you need him to pick up and raise it slightly ready for you.
Look for any signs of injury or thrush. Save time by picking into a skip (small, low container). This keeps the dirt out of the bedding if you are in the stall and saves you from having to sweep up no matter where you are. Tap on the shoe to make sure it is not loose.
dandy brush - for a grass-kept horse you should use the dandy brush all over his body to remove dried mud and caked on dirt. It can be held in either hand. Start at the poll on the left (near) side and work over all the body and down the legs. Use short, flicking strokes to get all the dirt out from the long hair. Do not brush too hard on sensitive areas. On a stabled or clipped horse, the dandy brush is only used where his coat is long. With the introduction of the rubber and plastic curry comb, some people prefer to use them at this point in the grooming process.
cactus cloth - this can be used on a stabled or clipped horse, instead of the dandy brush, to remove stable stains, dirt, and sweat marks. It can also be used on horses with sensitive skin.
body brush and curry comb - the body brush is the main brush used on a stabled horse. It's used to remove dirt, dust, and scurf from the skin. The curry comb is used to keep it clean.
Start with the mane. Throw the mane over to the opposite side of where it would normally lay. Brush the crest and exposed neck area. Then gradually pull the mane back a little at a time and brush through each section.
Once the mane is done work on the rest of the neck and progress down to the shoulders. Use short movements with enough pressure to penetrate through the hair to the skin. After every few strokes scrape the body brush against a curry comb to clean it. When you are grooming the left side of the horse the body brush should be in your left hand and the curry comb in your right. Switch them over to the other hands when you groom the right side. Use the body brush all over the horse including the legs.
The body brush can also be used on the head and forelock. When brushing the face untie the horse. You don't want him to suddenly pull back and feel like he can't get away. You can leave the lead rope threaded through the breakable string and hold onto the loose end. If you are using cross-ties unclip them and clip the lead rope onto the 'O' ring. Unfasten the halter and temporarily place it around the horse's neck. Hold the lead rope with one hand and gently brush his face with the other hand.
The body brush can also be used on the tail. If the tail is very tangled use your fingers to tease out the knots before brushing. Never use a metal comb on the tail as it breaks the hairs. Stand to one side facing backward when brushing the tail. The only time you should ever stand directly behind a horse is when applying a tail bandage.
sponges - dampen one of the sponges and clean his eyes, nostril, and muzzle. With the other sponge wipe underneath his tail and the dock area. It's a good idea for the sponges to be different colors so that you don't get them mixed up. They must be cleaned regularly.
water brush - use the water brush to 'lay' the mane and tail. Dip it in a bucket of water and shake off any excess. Dampen down any stray hairs on the mane. You can also use it to lay down the hairs at the top of the tail. This would be the time you would apply a tail bandage if necessary.
hoof oil and brush - when the feet are clean and dry you may paint them with hoof oil. It is beneficial in summer when hooves tend to be dry and brittle and also in winter when the ground is wet. This also helps with the overall appearance when a horse is being formally inspected.
How to Wash a Horse
Although we all do it, it is not recommended that you wash your entire horse. Shampoo, no matter how mild, strips the coat and skin of oils that naturally provide protection against wind, rain, and flies. If you must wash your horse he will need to be blanketed for about a week until the oils return if he will be outside in inclement weather.
Washing the Mane
Before you begin to wash the mane you should brush it thoroughly with the body brush (see the body brush and curry comb section above) or a human hairbrush. Wash stalls are becoming more popular and make washing the mane much easier. If you do not have access to a wash stall you can use a bucket of warm water and a large sponge or water brush. Either way, wet the mane thoroughly starting at the withers.
If using a hose run the water onto the horse's front leg first and gradually move up his shoulder to the withers. This way it doesn't come as too much of a surprise to him. Pull the forelock back through his ears to join the top of the mane. Use a sponge or water brush to help the water to penetrate deep into the mane. Once the mane is thoroughly wet use a mild shampoo and work it into the mane. When you have washed the entire mane rinse it thoroughly starting at the poll.
Be careful not to get soap or water in the horse's eyes or ears. Make sure the water runs clear and is free of any shampoo. Use the sweat scraper to remove the excess water from your horse's neck. Some people like to also use a conditioner. This gives the mane a soft fluffy appearance but doesn't work well if you plan to braid.
Washing the Tail
As mentioned above this is easier if you have access to a wash stall but can still be done with a bucket and large sponge or water brush. As with the mane, make sure that the tail has been brushed through thoroughly with a body brush or human hairbrush before you begin to wash it.
Wet the tail thoroughly either with the hose or by submerging it in the bucket. You need to know your horse well and how he will react before attempting either of these procedures. Whenever the dock of a horse is thoroughly wetted the horse usually buckles slightly with their back legs and appear as if they will fall down. This passes quickly and helps if you speak gently to them to reassure them that everything is ok. If you are using warm water this is less likely to happen as it won't be too much of a shock to the horse.
When the tail is completely wet, shampoo and rinse thoroughly. Squeeze out excess water with your hands and swing the tail gently to remove any remaining water. If you want to apply conditioner to the bottom of the tail you can do so and rinse it thoroughly. Do not apply it to the top as it will give it a 'fly away' look. While the tail is still damp apply a tail bandage.
Washing the Feet
Do not wash your horse's feet too often as overexposure to moisture is not good for them. Sometimes, however, it is necessary to remove excess mud. Use the water brush dipped in warm water. Using the thumb on your hand, that is holding up the foot, press it into the hollow of the heel to prevent water from seeping in there. If your horse's feet need to be washed in winter or if they are likely to be wet regularly smear petroleum jelly onto the heel to help prevent cracked heels or scratches.
Washing a Horse
If you really must wash your horse make sure it is on a warm day when he won't become chilled. Start with the mane and work down one side. Wet, wash, rinse, and use the sweat scraper as you go. Do not allow him to stand completely wet or allow the shampoo to dry on his skin. Finish with his tail. Be sure to offer extra protection until the natural oils return.
Disclaimer: We do not warranty any of these companies or products. These are items we use/have used and find them suitable for our needs. You should research these products before purchasing them. We are not sponsored by any of the aforementioned companies or products. These products have been bought by us for our own use. The links are affiliate links.
Follow our every move and keep up-to-date with tips, advice, and events, etc.
Father's Day is quickly approaching (June 16th, 2019) but there is still time to buy something special for your horse show dad.
Some dads understand that learning to ride is so much more than just learning to ride. They recognize that being around horses and helping at the barn also instills compassion, empathy, teamwork, hard work, coordination, and so much more. These dedicated dads don't mind getting up early or going to bed late so their child can have extra time with their horse. They learned how to tow a trailer and load a horse just so their child can compete in shows. Their dedication and commitment to their equestrian should be recognized regularly but even more so on Father's Day.
What does your horse show dad need?
T-Shirt - Of course no horse show dad would be complete without the obligatory horse show dad t-shirt.
Photo Album - These days most people store their photos on their phone. A great way to memorialize your time spent with your dad is to get him a photo album of your journey together. This self-adhesive photo album makes it easy to present your photos and mementos. Try this link to order prints from your phone.
Drink Container - All equestrians know that barn time is not the same as regular time. Especially during long hot days at the barn in summer, it is important to stay hydrated. Get your dad a 26oz Yeti Rambler. I have one of these and can tell you it keeps my drink cold all day long.
Fitbit - If your dad is a fitness freak or just wants to get fitter a Fitbit is a great idea. He will be able to track his steps, exercise, and calorie intake. They are fun to use and can be synced to a smartphone.
Overnight Bag - Oftentimes showing requires overnight stays. Your dad should travel in style, just like you and your horse. A versatile overnight bag is an ideal gift and a great way to say thank you.
I'm sure that horse show dads are happy with their role and get immense satisfaction from spending time with and watching their equestrian learn and grow. However, it is still important to show some extra love on Father's Day.
The kind of horse equipment you need will depend on which equine activity you participate in. This blog concentrates on the basic horse equipment needed to safely enjoy and ride your horse.
Horse equipment is called saddlery or more commonly, tack. It consists of a saddle (fitted with a girth, stirrup leathers, and stirrup irons) and a bridle with an appropriate bit.
Leatherwork
The best material for tack is good quality leather. Cheap tack is often low-quality leather. It can be hard and brittle and not last as long. Tack is an expensive investment but if looked after correctly it can last you a very long time.
It is vital that:
the tack fits the horse and rider (more about this in an upcoming blog)
it is the correct type for the job you and your horse will be doing
you take good care of it by regularly cleaning it (more about this in an upcoming blog)
Buying Used Tack
Make sure that the leather is good quality and in good condition. Stitching should be strong and not perished. It is imperative when buying a used saddle that the tree is not broken or twisted. To check for a broken tree hold the cantle of the saddle against your hip and try to pull the pommel towards you. If it is a fixed tree there shouldn't be any movement at all. If it is a spring tree you should feel a gentle flexing that springs back into place when you release the pressure. To check for a twisted tree look from the cantle towards the pommel to make sure they are in line with each other. Also, check that the front arch under the pommel does not move or make a noise when you put pressure downwards onto it. Wrinkled or stretched leather on the seat can indicate there is probably some internal damage to the saddle and you shouldn't buy it.
Synthetic Tack
Synthetic tack is becoming more and more popular and can be a cheaper alternative. It is also lighter than leather which makes it easier for children to handle. If you do decide to buy synthetic tack make sure it is a reputable make as some of the non-named brands are cheaply made and do not last very long. I personally do not like synthetic tack but I have friends who swear by it so it really is a personal decision.
Metalwork
The metalwork on your saddle and bridle (stirrup irons, buckles, bits, etc.) should be made of top quality steel. Stainless steel is the best as it resists staining and discoloration, doesn't chip or flake, and is very durable. Nickel (often found on cheap tack) can be dangerous as it is much softer and can bend or break.
Bridles
The Parts of a Bridle and Functions
Headpiece and Throatlash - made from one piece of leather. Together with the cheek pieces, the headpiece supports the bit. The throatlash helps to keep the bridle in place by fastening loosely under the horse's throat. When fitted correctly you should be able to fit four fingers, sideways, between the leather and the horse's neck.
Browband - this lies across the brow of the horse and prevents it from slipping back. It should be tight enough so as not to sag away from the head but not so tight that it causes the headpiece to rub the back of the ears.
Cheekpieces - these attach to the headpiece at the top and the bit at the bottom. They should be snug enough to hold the bit in place but not so tight that the bit pulls up into the horse's mouth.
Bit - the bit attaches to the cheekpieces and reins. It should protrude about a ¼ inch or the width of your little finger at each side of the horse's mouth. When the bridle is on the horse the bit should make the horse look as if he is very slightly smiling. Bits can be made of copper, sweet iron, or aurigan to give the bit a more palatable taste for the horse and encourage salivation. For a more robust feel, some horses prefer a bit made of vulcanized rubber. Often times you will have to try a few different bits before you find one your horse really likes.
Reins - attach to the bit and are used to help steer the horse. They are available in different types of material.
Plain leather - they look very smart but can be slippery when wet
Leather With Grips - these have good grip but only at certain intervals along them so can be restrictive for subtly altering the amount of contact
Laced or Plaited - less slippery than plain leather but more expensive and more difficult to clean
Rubber Over Leather - these give the best grip especially in rain or on a sweaty horse. One option with these reins is Rainbow Reins with bands of different colors. These are great for teaching novice riders where to hold the reins.
Rubber Reins - usually used with a rubber (rather than leather) bridle. They are very easy to keep clean as you can wash them with soap and water but are slippery and not very pliable
Nylon Reins - not very popular with English riders anymore
Noseband - the cavesson noseband is the standard type and the only kind to which a standing martingale can be attached. You should be able to fit two fingers under it at the nose. There should be a 'two-fingered' space under the projecting cheekbone.
Parts Of A Bridle
Saddles
There are many different makes and models of saddles available. The main types are:
Jumping Saddle (Close Contact) - has a flat seat with the panels cut forwards. Designed for riding with shorter stirrup leathers it can have large knee-rolls which help to keep the rider's legs in the correct place.
Dressage Saddle - has a deep seat and straight cut flaps. It usually has extra long billets and uses a shorter dressage girth. This design allows the rider to sit deep with the correct leg position.
General Purpose - designed for general riding it is shaped between a dressage saddle and a jumping saddle. Due to the fact that tack is so expensive, most pleasure riders use a general purpose saddle
Saddle Sizes
It is important that the saddle fits both the horse and the rider. (More about this in a later blog).
Saddles are measured from the pommel to the cantle. Standard sizes are 15" - 18". On saddles with a cut back head, measure from the stud at the side of the pommel to the cantle. The size of the saddle is determined, generally by the size of the rider but should never be too long on a horse's back as it would put too much pressure on his kidneys.
They are available in three widths - narrow, medium, and wide. Some pony saddles are also available in extra wide. The width is determined by the shape of the horse's back and withers.
Anatomy Of A Saddle
Tree
The tree is the foundation of the saddle and is usually made of laminated wood but plastic and fiberglass are also used. A spring-tree saddle has a strip of flexible steel in the tree on both sides of the waist which gives the saddle a less rigid feel for both horse and rider but they are more expensive to buy. Quality saddles are usually stamped with the name or logo of the manufacturer on the panel along with the size. Sometimes it is on a metal plate. On older saddles, this was stamped onto the stirrup-bar.
Seat
The seat is the top of the saddle, between the pommel and cantle, where the rider sits. It is formed by strips of webbing stretched across the tree. It is then padded and covered with leather or a synthetic material. The deeper the seat the more secure the rider will be.
Girth Straps Or Billets
These are attached to the webbing strips that form the seat. The first strap is attached to one piece of webbing and the second and third straps are attached to another. For safety reasons, you should always attach your girth to the first strap and either the second or third, never the second and third.
Stirrup-Bars
These are attached to the tree. They should be open-ended to allow the stirrup-leathers to slide off should the rider fall from the horse and get their foot stuck in the stirrup. On most saddles, the stirrup-bars have a hinge that can be turned up to prevent the stirrups from falling off a horse that is being lead or lunged. NEVER ride with the bar turned up. Bars that are not open-ended or are in the shape of a sideways D (usually on a pony pad) should never be used without safety stirrups.
Panel
This is the underside of the saddle that lies against the horse's sides. Some panels have knee rolls at the front and some even have thigh rolls behind the rider's leg, all designed help keep the rider's leg in the optimal position. It usually comes down almost to the bottom of the saddle flap. A half-panel reaches halfway down the saddle flap and has a large sweat flap to stop the girth buckle from pinching the horse's skin. These are not very common anymore.
Flap
The flap is the outer part, that covers the panel, where the rider's leg lies. The size and shape is determined by the style and use of the saddle as it helps position the rider's leg correctly.
Gullet
The gullet is actually the space between the bars of the saddle but is generally known as the space under the saddle and rests above the horse's spine. There should be enough clearance so that no part of the saddle is ever in contact with the horse's spine. The width of some saddles can be altered with interchangeable gullets.
Waist Or Twist
This is between the seat and the pommel. The size of the waist can greatly affect the comfort of the saddle for the rider.
Pommel
The very front of the saddle. It is higher than the seat and helps provide stability for the rider. It needs to be high enough so that it does not rub against the horse's withers. The pommel of a jumping saddle is lower than that of a dressage saddle allowing the rider to ride in two-point (forward) position.
Cantle
The back of the saddle that is higher than the seat. It, along with the pommel, gives the rider security in the saddle.
Skirt
A small piece of leather that covers the stirrup bar to help prevent rubbing on the inside of the rider's leg.
Stuffing
The stuffing in a saddle is normally wool, synthetic, foam, or felt. The saddle should be stuffed evenly and never feel lumpy. As saddles get older they sometimes need re-stuffing. This can also be called re-flocking.
D Rings
Metal rings attached to the saddle and used to attach various items. The ones on the front are mainly used to connect a breastplate. They are also useful for attaching a strap for novice riders who are learning to balance and riding on the lunge. The ones on the sides near the seat can be used for saddle bags. Not all saddles have the rear D rings.
Parts Of A SaddleIMAGE OF A SADDLE
Girths
This is what holds the saddle in place so it is vital that it fits comfortably and correctly. The size is measured from end to end including the buckles. They can be made from many different materials.
Leather - if correctly looked after these look very smart and are comfortable for the horse but are expensive to buy.
Three-Fold - is a single piece of soft leather, cut straight and folded to form three layers with two buckles at each end. Between the folds, there should be a piece of flannel or other material, which should be soaked occasionally in neatsfoot oil to keep the leather soft. The folded edge should be towards the front of the horse.
Balding - one piece of leather with two buckles on each end. The center part is divided into three strips. They are crossed over and stitched in the middle. This reduces the width of the girth behind the elbow of the horse where it could cause girth galls. Because the leather is in strips make sure they do not pinch the horse's skin between them.
Atherstone - made of one piece of leather with two buckles on each end, it is shaped similar to the Balding but it has a leather strip stitched down the center on the outside to hold the shape. This style also helps prevent girth galls.
Fleece - this is a synthetic material with a fleece lining designed to wick away moisture from the horse's skin. These are popular with hunt seat riders.
Dressage - these girths also come in various different materials and are usually much shorter than regular girths as the billets on a dressage saddle are longer.
Stirrup Irons
These should be made of stainless steel and be the correct size for the person riding the horse. They should allow ½" at each side of the rider's boot. Rubber treads help to stop the foot from slipping. It is very dangerous for a person to ride with stirrups that are too big, allowing their foot to slip all the way through. Children and small adults who, if they got their foot caught in the stirrup and fell off, might not be heavy enough to pull the stirrup leather off the stirrup bar should use safety stirrups.
Peacock or Safety Stirrups - these stirrups have a thick roll of rubber along the outside of the iron. This rubber will easily snap off if someone falls from the horse making it far less likely that they will get their foot caught in the stirrup. The disadvantages are that it does not hang level as it is heavier on one side. The rubber perishes over time and needs to be replaced. They have also been known to bend under extreme pressure.
Bent Leg - these have a curve or bend on one side. The bend should be to the outside and bend towards the front. They hang straighter than the Peacock style but you may find that your foot slips out of them until you get used to how they feel.
It is essential to use a safety stirrup with a saddle that does not have an open-ended stirrup bar.
Stirrup Leathers
The stirrup leather passes through the stirrup bar and the gap in the top of the stirrup iron. They have a buckle to adjust the length. All leather stretches over time so make sure the holes are still level on each one. It is a good idea to regularly swap over the left and right leathers as the left one will stretch more because of the rider mounting from that side. Stirrup leathers should be shortened periodically at the buckle end so that they don't always wear in the same place. They can be made of different types of leather and other materials.
Ordinary Leather - if this is top quality leather it looks the smartest but can break under extreme pressure. They are usually used for showing.
Rawhide - these are virtually unbreakable and usually used by cross country riders. They can look thick and clumsy.
Buffalo Hide - these are also virtually unbreakable but are reddish in color and don't always match the color of the saddle. They are more prone to stretching than other leathers.
Synthetic - made from a synthetic material they are easy to clean. The thin material kind are flexible but crack and flake easily. The thick rubber kind aren't very pliable making it difficult to adjust the length.
Martingales
There are four different types of martingales. They are all used to help control the horse.
Running - this is attached to the girth and passes between the forelegs and through the neck strap. It then splits into two and each piece has a ring on the end. The reins pass through the rings. When fitted correctly the ring should reach up into the horse's throat or back to the withers. It should only come into play if the horse lifts his head too high. It should not be used to keep the horse's head down. The buckle on the neck strap should be on the left side and allow four fingers clearance between the strap and the withers. The straps with the rings on should not be twisted when passing the reins through.
Standing - this is attached to the girth and passes between the forelegs and through the neck strap. It is then attached to the back of a cavesson noseband (or the cavesson part of a flash noseband). It should be long enough to reach up to the horse's throat or back to the withers. The buckle on the neck strap should be on the left side and allow four fingers clearance. It is used to stop the horse from raising his head above the level of control. A standing martingale is more restrictive than a running martingale.
Irish - this is two rings connected with a strap approximately 4" long. It is used under the horse's neck with the reins passed through it. It is used to keep the reins in place and close to the horse's neck and to help prevent them from coming over the horse's neck should the rider fall off. It is often used in horse racing.
Bib - this is a combination of a running and Irish martingale. A bib fills the space where the running martingale divides into two. It is fitted the same way as a running martingale and has the same effect but also keeps the reins closer together.
Breastplate
There are various different types of breastplate but they are all designed to prevent the saddle from slipping backward. They attached to the D rings on the front of the saddle and between the forelegs and onto the girth. They should be tight enough to be effective but not so tight that they interfere with the horse's movement.
Crupper
This is used to stop a saddle or roller from slipping forwards. It is a loop that fits around the horse's dock and a strap which fastens onto the D ring on the back of the cantle. The part that fits around the dock can be made of soft folded leather but the more expensive ones are hollowed leather filled with crushed linseed which, when warmed by the horse's body heat, releases oil through the leather which reduces the chance of rubbing. They are most often used on small ponies with flat withers.
Saddle Pads
These come in all shapes and sizes and are used, under a saddle, to provide extra padding and to keep the underside of the saddle clean. They are fitted with webbing on each side and at the bottom. One saddle billet should pass through the webbing at the top and the girth should pass through the webbing at the bottom. This helps prevent the pad from slipping backward. When tacking up pull the pad up into the gullet of the saddle so that it doesn't put pressure on the horse's spine. Also, make sure that it lies flat under the saddle. If it is wrinkled in any way it will be uncomfortable and could cause pressure points on the horse's back. Pads can be fitted or rectangular in shape. Fitted pads should be the correct size for the saddle and be slightly bigger, about 2" all the way around. Generally, fitted pads are used for hunt seat riding whereas rectangular pads are used for dressage, jumpers, and cross country.
Types of Saddle Pads
Cotton Covered Foam - these are very popular and available in many different colors. They are easy to look after and can be machine washed. They are only semi-absorbent and shouldn't be used if they are damp. They should be washed regularly.
Sheepskin - these are the best as it is a natural fiber and absorbs sweat easily however they are expensive to buy.
Synthetic Sheepskin - these vary in price and quality. The types that absorb sweat are suitable but the other kinds should be avoided.
Felt - although not used very often anymore they are absorbent and good at minimizing pressure or concussion. They are expensive and difficult to keep clean.
No matter what kind of riding you do or what kind of tack you own it is very important to look after it and keep it clean and in good repair.
Previous Blog: Grooming A Horse
Next Blog: Tacking-up, Removing, and Maintaining Tack (Coming soon)
More and more equestrian companies are inventing and developing new and innovative equestrian products and trying to convince us that we can not live without them. Some are useful, others, not so much.
Over the years I have amassed a large collection of equestrian items. Some have proven to be invaluable whereas others were a waste of money.
I have put together, in no particular order, a list the 12 equestrian products (and some non-equestrian products) that I use on a regular basis that help me do my job.
Fly Spray - I have tried every fly-spray available. Some work better than others. Some don't work at all. The thing I don't like about, most, of the commercially available products, are the chemicals used to kill or repel flies. This is why we decided to create our own. 49% water, 49% white vinegar, 2% cedar oil. Mix together in a large container and put into spray bottles. It not only smells good but it is also harmless to the horses and can safely be used on people.
Fly Masks - No matter how well your fly spray works the effect only lasts a certain amount of time. During the hot summer months, when flies are more prevalent, our horses are in their stalls relaxing under the welcome breeze of their stall fans (see #3). They spend the nights out in the pastures. To give them relief from flies and gnats, after the fly spray has worn off, we make sure they each have a carefully fitted fly mask. I prefer the kind that covers the horse's ears to keep out the annoying bugs.
Stall Fans - Our stall fans are invaluable in the blistering heat of the summer. They keep the air circulating in the barn and help to keep the horses cool and stress-free. Having heard so many horror stories of box fans catching fire we invested in some high efficiency, closed motor fans. Yes, they are more expensive but even on the lowest setting, they are more powerful than a regular box fan. They are also safer as dust cannot get into the moving parts of the motor.
Hose Reel - Not only is it dangerous but it also looks unsightly to have a water hose strewn across the barn aisle. At each end of our barn, we have a hose that we use to fill and wash water buckets and also bathe horses. When it's not in use it is carefully and easily stored in our wall-mounted hose reel.
Sun Protection - I can not stress enough the importance of protecting your skin from the sun. According to The American Society for Dermatological Surgery skin cancer is the most common form of cancer in the United States. More than 3.5 million skin cancers in over 2 million people are diagnosed annually. There is no such thing as a safe tan, even if you tan easily without burning. I never leave the house without sunscreen, my sun hat, and my sunglasses. I use the Neutrogena Ultra Sheer Body Mist Sunscreen. It goes on easily and is non-greasy (which I love). It also has a very unique handle set-up making it easy for me to spray my back. I use, year-round, Neutrogena Age Face Lotion on my face. It goes on smoothly and works great alone or under make-up.
Hay Nets - Some equestrians swear by hay nets and some will not use them. That discussion can wait for another day. I use them because we have so much grass that our horses, when stalled, really don't need to be filling their faces with hay. Of course, it isn't safe to allow a horse to go for long periods of time without food so I feed them good quality hay in a slow-feeder hay net. It keeps them occupied and their digestive system full without allowing them to gorge.
Pestle and Mortar - I know not everyone will need a pestle and mortar. We do because our cute, little Shetland has Cushings and needs daily medication. Originally, I was breaking up the medicine and mixing it in with her low-carbohydrate feed but after a while, she decided she didn't want to eat it anymore. So, now, the only way to ensure she gets the correct amount of medicine is to pulverize it into a powder, mix it with water, and administer it, orally, with a syringe. I couldn't do this without our pestle and mortar.
Footwear - I absolutely love my Ariat H2O boots. They are the most comfortable footwear I have ever owned. I wear them every day. They are made of soft, durable leather that is also waterproof. I wear them around the barn and also ride in them. The sizes run big so I recommend you get a ½ size smaller than you usually wear.
Water Container - According to healthline.com the average adult should consume 8 x 8oz glasses of water daily to prevent dehydration. This amount increases drastically in hot conditions. I am not only an equestrian but also an advocate for reusing and recycling as much as possible. I do not purchase bottled water. Instead, I use our delicious well water and carry it to the barn with me in my Yeti Rambler. I add ice first then fill it up and it keeps my water cold all-day-long no matter how hot the weather gets.
Shaving Fork - How annoying is it when the tines on your shaving fork break rendering it useless? I was lucky enough to stumble upon The Forever Fork four years ago. Yes, that's right. I have been using the same shavings fork for four years and it's still going strong. I have banged it, accidentally, against the wall more times than I care to remember. Horses and children have knocked it over. I have even run over it with the trailer I use to collect manure and it still didn't break. I can not emphasize enough how amazing this product is. It is more expensive than a regular fork and worth every single penny.
Schooling Tights - When the weather is hot and sticky it can be less appealing to ride. But, ride we must. Whether for pleasure or to achieve a goal it is important to keep ourselves and our horses in the best condition possible. My go-to riding pants for summer are Kerrits Ice Fil Tec Tight. They are comfortable, flexible, and breathable.
Gate Latches - There are so many different gate latches available these days it's difficult to know where to start. I've tried a few and always come back to the Tough-1 Qwikee Gate Latch. They are easy to install and, if positioned high enough, easy to open and close while riding on the trails. We have them on all our gates.
I hope you have found this list interesting and informative. What are some of your must-have equestrian products?
This list mostly applies to the summer months. I will write another blog later in the year to include winter items.
Disclaimer: We do not warranty any of these companies or products. These are items we use/have used and find them suitable for our needs. You should research these products before purchasing them. We are not sponsored by any of the aforementioned companies or products. These products have been bought by us for our own use. The links are affiliate links.
Follow our every move and keep up-to-date with tips, advice, and events, etc.
We had another very successful Fun Show here at White Rose Equestrian today. Thank you to all the parents who put trust in us and support our shows. Showing is so much more than winning ribbons. By allowing your kids to show you are giving them an opportunity to put into practice what they learn in lessons. It gives them the change to figure out what works and it greatly improves their riding and confidence.
Riding Club Points for this Show are as Follows:
Rider
POINTS
POSITION
Sophia Eaton / White Rose Rubydoo
70
1
Michayla Belus / White Rose Sweet Sierra
37
2
Riley Hughes / White Rose Sweet Sierra
36.5
3
Kayleigh Beckemeyer / White Rose Moonfire
36
4
Isabella Hendricks / White Rose Sweet Pocket Full of Sunshine
28.5
5
Lena Davis / White Rose Buttercup
28
6
With some of our riders unable to attend the show today, we had a big shake-up of the leaderboard. I don't like to put too much emphasis on the overall points. Our motto at White Rose Equestrian is that showing should be fun but it is also good to be competitive. It makes you strong and determined and those are good traits that will help you throughout your life.
Riding Club Points for the show season so far are as follows:
 Christmas is right around the corner, and if you are anything like me, you will have been procrastinating since the beginning of fall about when you were actually going to start your Christmas shopping.
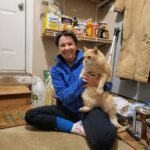
 I recently saw a post in an equestrian group on Facebook asking, how much does it cost to keep a horse for a year? Many people responded. My favorite answer was 'your heart and soul'. That pretty much sums up the life of an equestrian. But, it got me thinking. Horses and the sports that go along with them are, for most of us, far more than a hobby they are a way of life.


 Day after day we see a weather forecast with highs in the 90s. Perfect if you plan to sit around a swimming pool with a cold beverage. Not so perfect if you happen to be a barn manager.
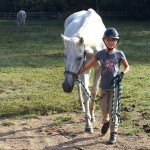

 Before you begin to groom your horse he should be tied up correctly as described in the previous blog post
 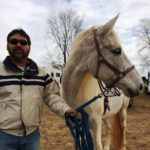 Some dads understand that learning to ride is so much more than just learning to ride. They recognize that being around horses and helping at the barn also instills compassion, empathy, teamwork, hard work, coordination, and so much more. These dedicated dads don't mind getting up early or going to bed late so their child can have extra time with their horse. They learned how to tow a trailer and load a horse just so their child can compete in shows. Their dedication and commitment to their equestrian should be recognized regularly but even more so on Father's Day.
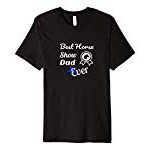
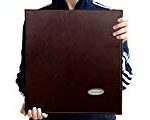
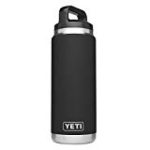
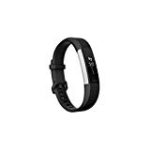
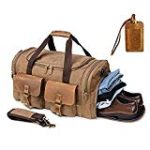
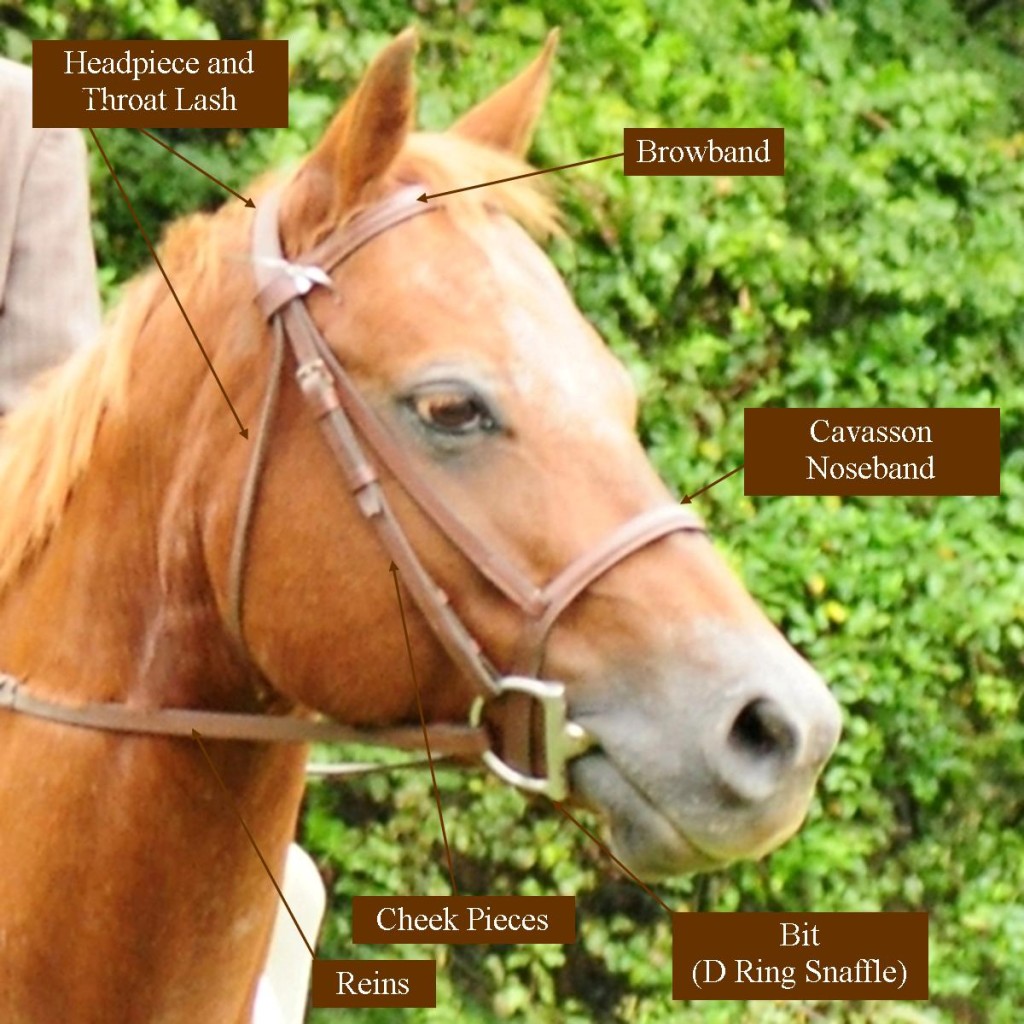
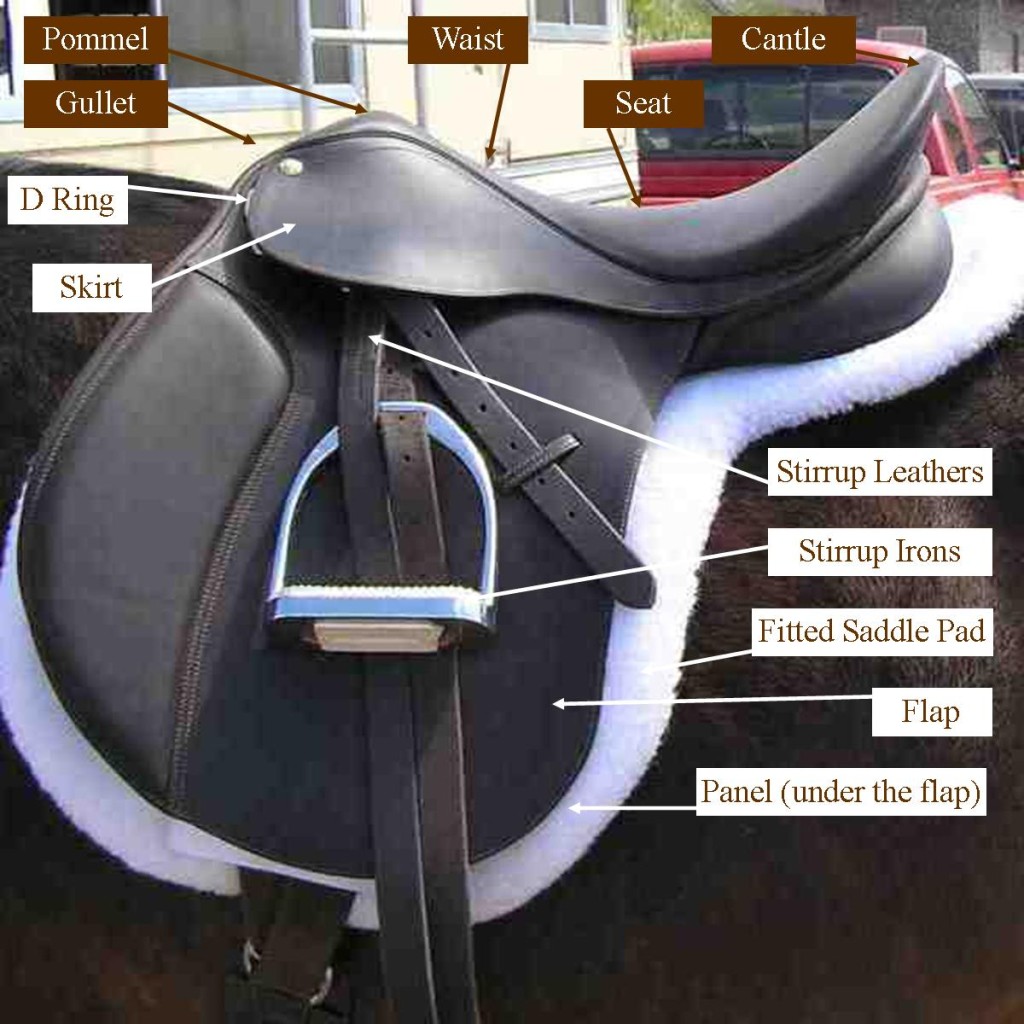
 We had another very successful
  With some of our riders unable to attend the show today, we had a big shake-up of the leaderboard. I don't like to put too much emphasis on the overall points. Our motto at White Rose Equestrian is that showing should be fun but it is also good to be competitive. It makes you strong and determined and those are good traits that will help you throughout your life.